Sharing large files doesn’t have to be a headache anymore. pCloud Transfer is here to save the day!
pCloud Transfer is one of the ways through which you can transfer upto 5 GB of files without registration.
In today’s article, we will talk about the most striking features of pCloud Transfer and the step-by-step process of sharing files through it.
If you wish to know more about pCloud, you can check out my detailed video here.
(video)
I personally use pCloud Transfer and Tresorit Send for transfering large files online. But, in this article we will focus on pCloud Transfer.
So, with no further delay, let us get started!
In today’s article, we will talk about pCloud Transfer, a free service provided by pCloud. If you wish to know more about pCloud, you can check out my detailed review here.
For transfer files I use pCloud Transfer and Tresorit Send. In this article we will focus on pCloud Transfer. So, with no further delay, let us get started!
What is pCloud Transfer?
pCloud Transfer is a free file transfer service offered by pCloud. It lets you share large files with anyone over the Internet.
You are free to transfer files up to 5 GB in size to anyone without registering your account on pCloud!
Wondering how it will benefit you and how is it different from other similar services? Let’s look at its advantages.
Advantages of pCloud Transfer
1. Transfer Large Files
With pCloud Transfer, sharing huge bulky files is a cakewalk! You can easily share upto 5 GB of files at a time.
I think it’s a lot better than other services like WeTransfer offering 2 GB of file transfer limit.
2. No Registration Required
Don’t you find it super annoying when you are asked to register yourself for merely transferring some files?
Most file transfer services require you to create accounts on their websites before sharing any data.
Guess what? That’s not the case with pCloud Transfer. You are free to send files to anyone without having an account on pCloud.
Simply enter the recipient’s email address and the transfer process starts immediately!
3. Encryption Applied
Worried about transferring your sensitive data online? Sit back and let pCloud Transfer take care of that!
You get an optional encryption option to secure your files with a password. Only the receiver knows this password, who will use it to decrypt the data.
I found this feature reassuring. Encryption adds a layer of security to your files. It ensures nobody accesses your data except for the one intended.
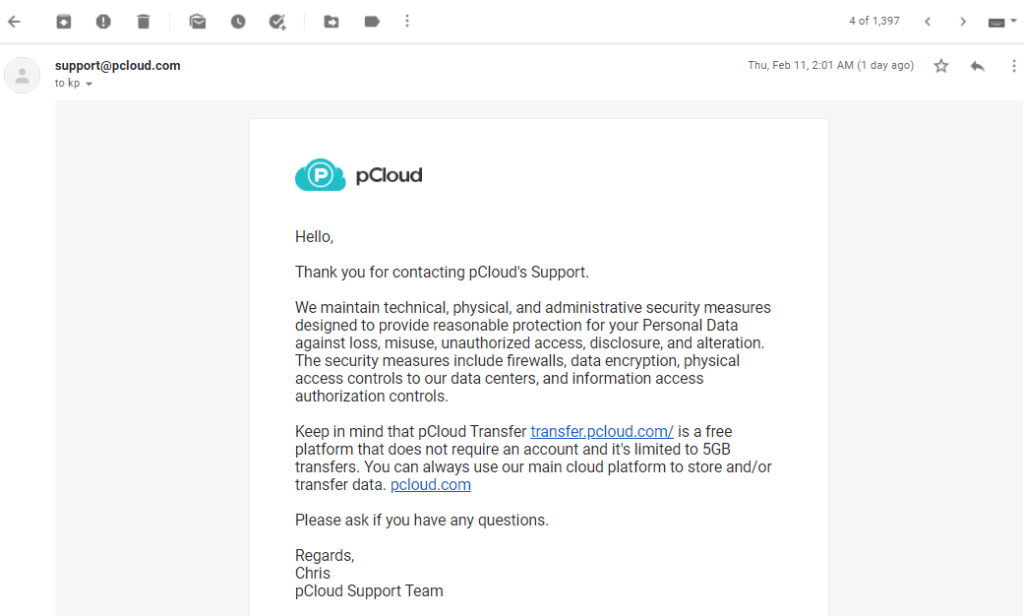
pCloud transfer is encrypted but it is not zero knowledge as per the information that we have received by contacting their support team. For Zero Knowledge secure file transfer you can take a look at Tresorit Send, which is also available for Free.
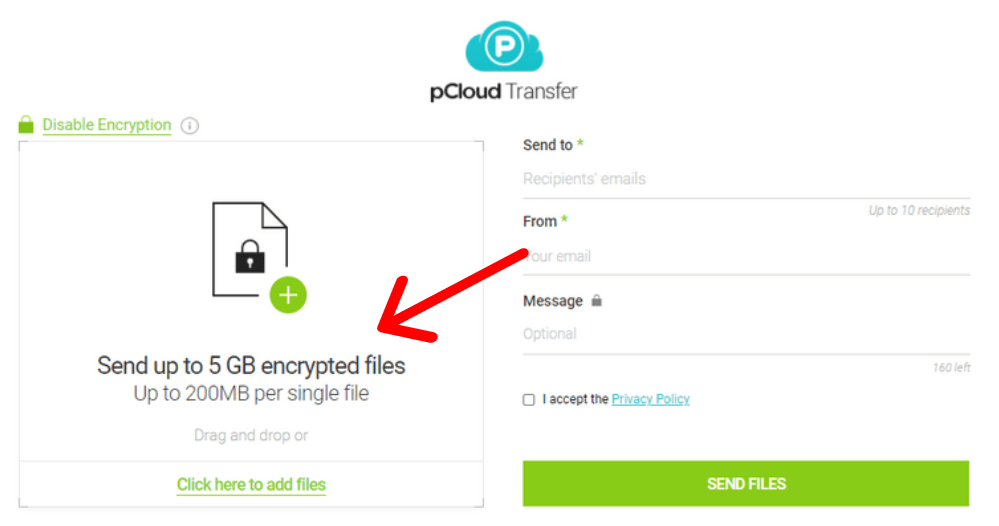
Another important thing to note is that if you enable encryption, though you get to transfer 5 GB of data in total, the individual files cannot exceed 200 MB limit.
4. Lightning Fast Transfer Speeds
You will witness impressive speeds while transferring your files through pCloud Transfer. My overall experience with this service was satisfying.
5. Notifications
While transferring files, you need to add the recipient’s and your own email address.
pCloud Transfer sends your email notifications about the details of the files transferred. When the receiver opens the email link, you get notified that they downloaded the data. I found this feature very helpful.
6. Expiry Date
pCloud Transfer provides a 7-day expiry limit on all the transferred files. This means that the user is free to download the shared data within 7 days.
After this limit is exceeded, they remove the files from their servers and they become inaccessible to anyone.
7. Easy to Use
I found pCloud Transfer extremely easy to use. The interface is decent, and easy to understand for a complete newbie.
It comprises limited functions, but everything works perfectly well, which is what impressed me a lot!
How to Use pCloud Transfer?
Let me walk you through the process of sharing your files with someone using pCloud Transfer. It’s pretty straightforward.
Step 1
Go to transfer.pcloud.com and simply drag and drop the files that you wish to share.
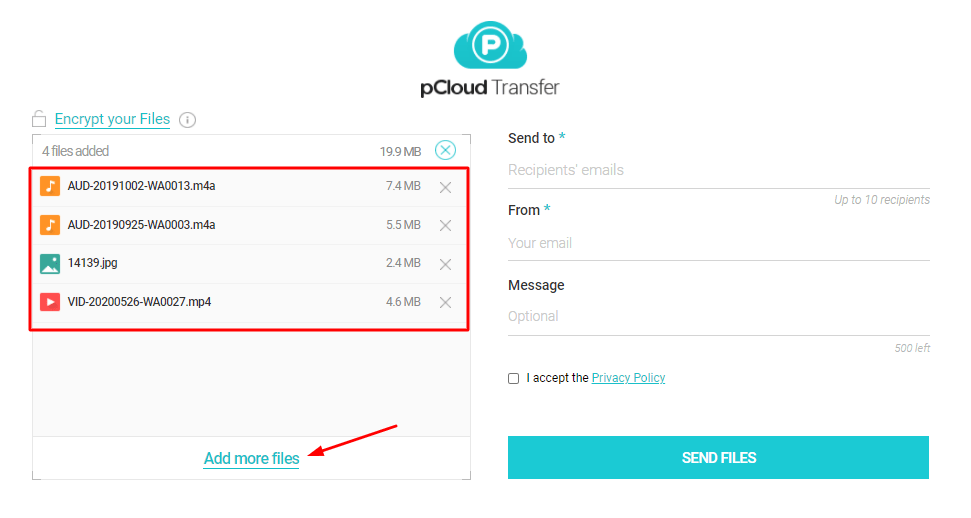
You can add multiple files upto 5 GB in total.
Step 2
Now, if you wish to secure your files with a password, click on Enable Encryption button. Enter a strong password to secure your files.
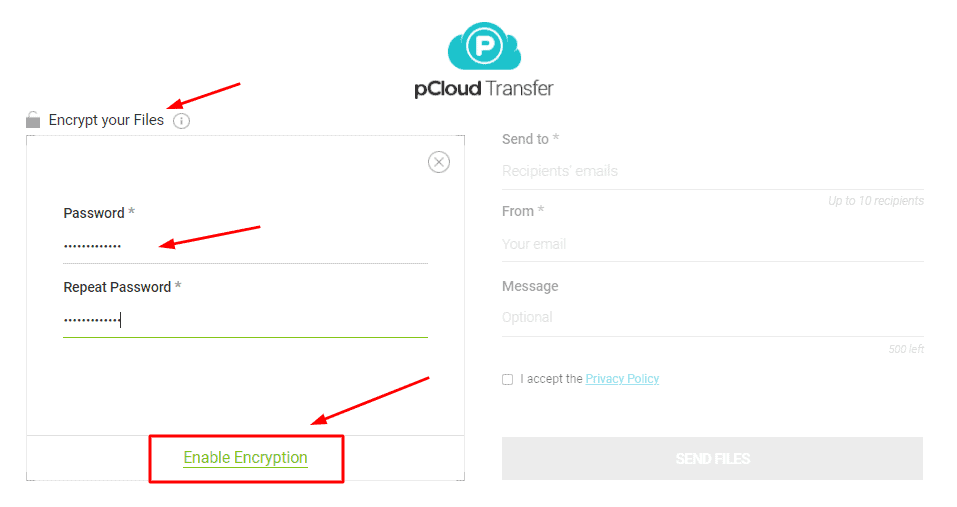
The receiver can only access these files after they enter the password.
If encryption is enabled, you can send 5 GB of data, but they only support individual files upto 200 MB.
Step 3
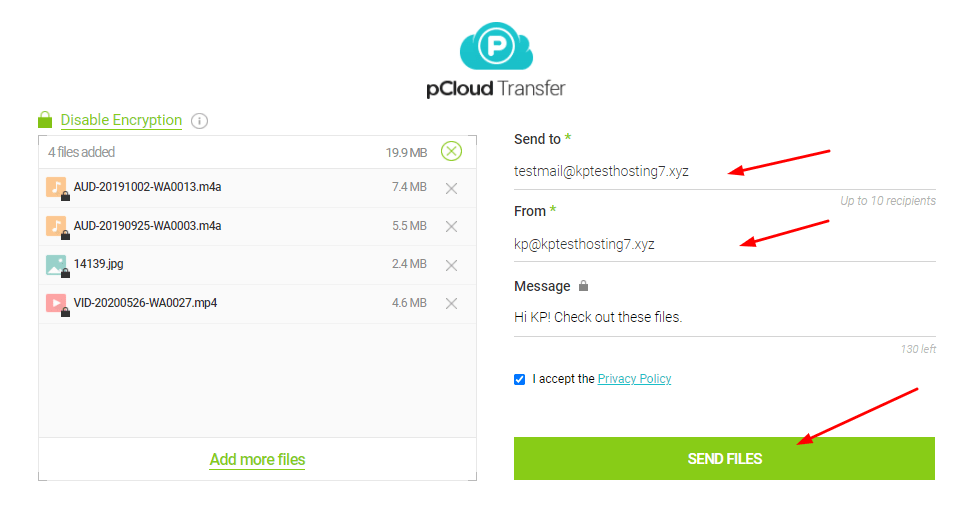
Next, add the recipient’s email address, and your own email address.
If you wish to add a message along with the files, you can do that too. Finally, click on Send Files.
Step 4
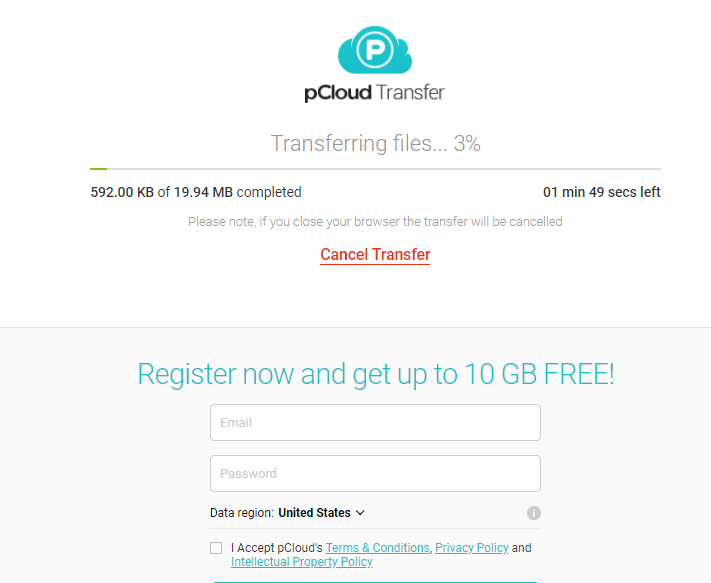
The transfer process is super quick! You also get an option to Cancel Transfer.
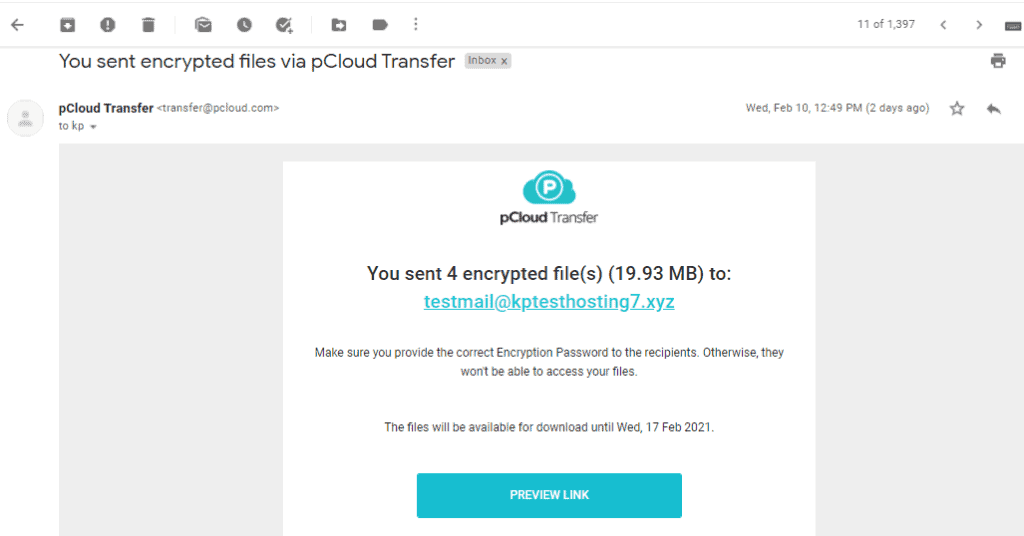
Remember, you entered your email address in Step 3? Want to know why that was important?
After the files are successfully transferred, you will receive an email notification about the same.
So, this is how you can share files via pCloud Transfer.
The shared data is available for 7 days, and the recipient can download it by entering the security password.
Should You Use It?
In my opinion, pCloud Transfer is a valuable service and everyone should use it when sharing extensive files.
With pCloud Transfer, you can forget the hassle of creating accounts, and share upto 5 GBs of files with your friends and family.
To ensure maximum security, you can encrypt your files with a strong password that only the receiving party knows.
The cherry on the cake is – it’s free! You should surely give it a try!
I think it’s a great alternative to services like Gmail (25 MB file limit) or WeTransfer (2 GB file limit), both of which lack password protection feature and lightning fast transfer speeds!
pCloud works smoothly and seamlessly. It’s fast, simple, and definitely worth a try.
Conclusion
Anyway, I hope you guys enjoyed reading this article. Check out pCloud Transfer and let me know your experiences with it in the comments section below.
P.S. If you wish to receive updates to more such interesting tools and online services, make sure you subscribe to my Newsletter.
This is Kripesh signing off! Take care, and keep learning, guys! See you in the next article.


How to transfer 20 GB data through Internet?
Use a cloud storage – upload your data on a folder – create a share link – send it.
How to generate direct download link of pcloud ? . I want to use it in telegram bot m so if I send the link to url uploader then it should be directly downloaded
It’s a cloud storage. It’s not meant for giving direct download links.
To have something like that you should use S3 solutions like Amazon S3 Bucket or digital ocean spaces.