Do you wish to buy a web hosting service for your website? Are you confused about the purchase process of a hosting and need some help? Then you are at the right place.
Many people have requested me to review HostPapa Hosting. All the hosting services that I review are solely based on my personal use and testing.
HostPapa has gained popularity in the last few years. It has acquired many hosting companies and has been growing consistently in Canada. So, I thought of purchasing and testing it out. (Keep an eye out for the detailed review coming soon!)
In this article, I am going to walk you through the step-by-step process of purchasing hosting from HostPapa. So, let’s get started!
Video Guide
For those who understand Hindi can watch this video.
Purchasing a Hosting from HostPapa (Step-by-Step Guide)
Step 1:
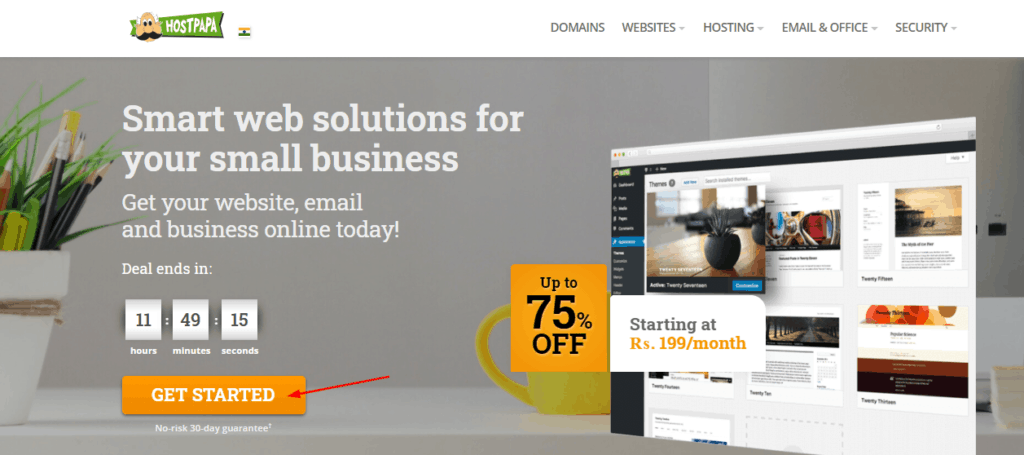
First, we will visit HostPapa’s website and click on the ‘Get Started’ button.
Step 2:
I am going to purchase the Business Hosting plan which is available for Rs. 199/month.
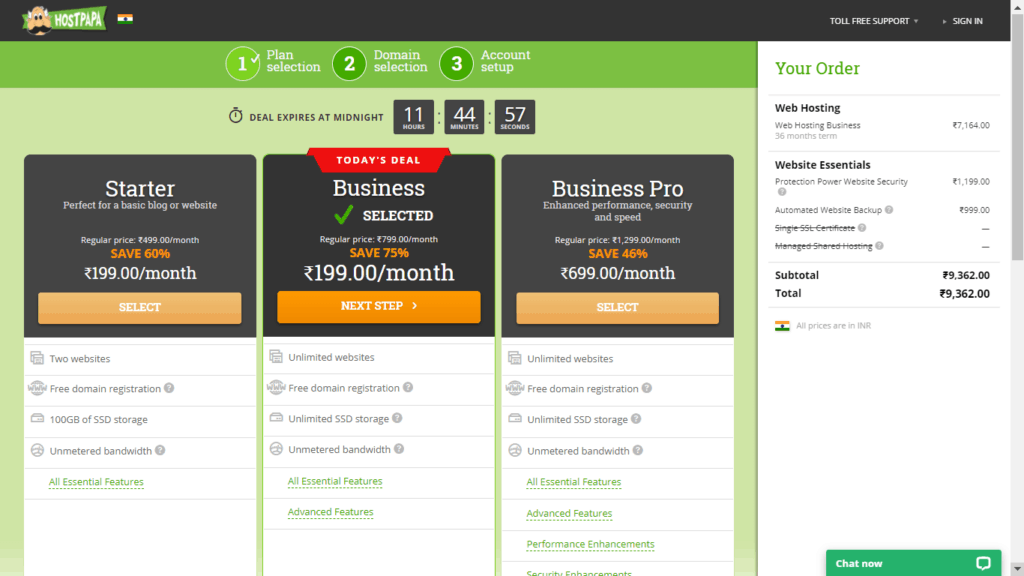
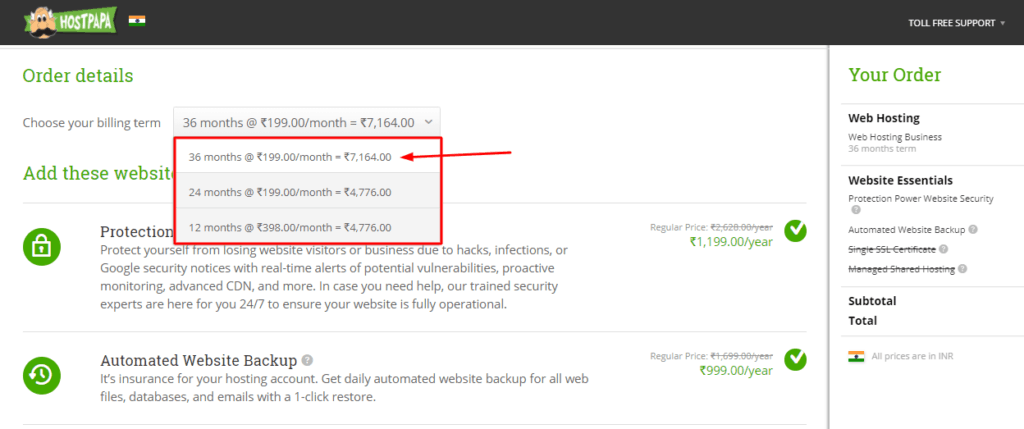
There are three options for time duration. The 3-year plan is the best, so I’m going to go with that.
Step 3:
If you go through the order details, they are offering Automated Website Backup and Protection Power Website Security. These additional features can be removed if you don’t need them!
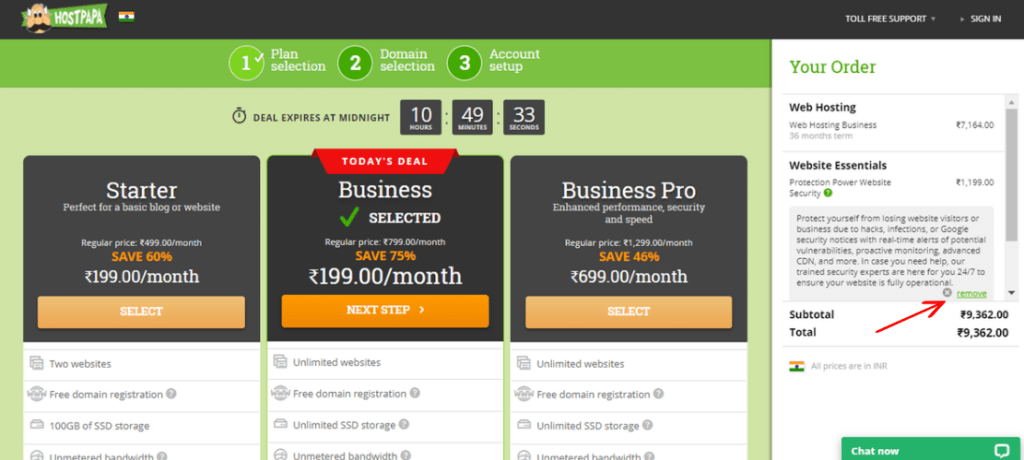
If you use Cloudflare, you won’t need these because it offers a strong website protection from DDoS Attacks as well. (Plus, this plan doesn’t provide you a free SSL certificate, you need to pay for that as well! That’s upsetting!)
Step 4:
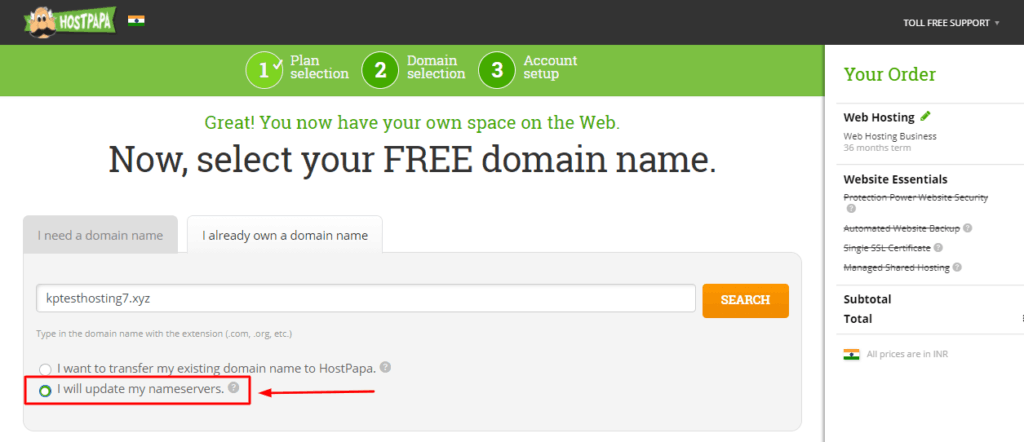
Now, in the next step, we are asked to get a domain or enter a domain name if we already own one. I recommend buying domain from other domain name registrars. Because I have a domain, I will select the ‘I will change my nameservers’ option.
Step 5:
In the next step, we will create our account and provide our personal details.
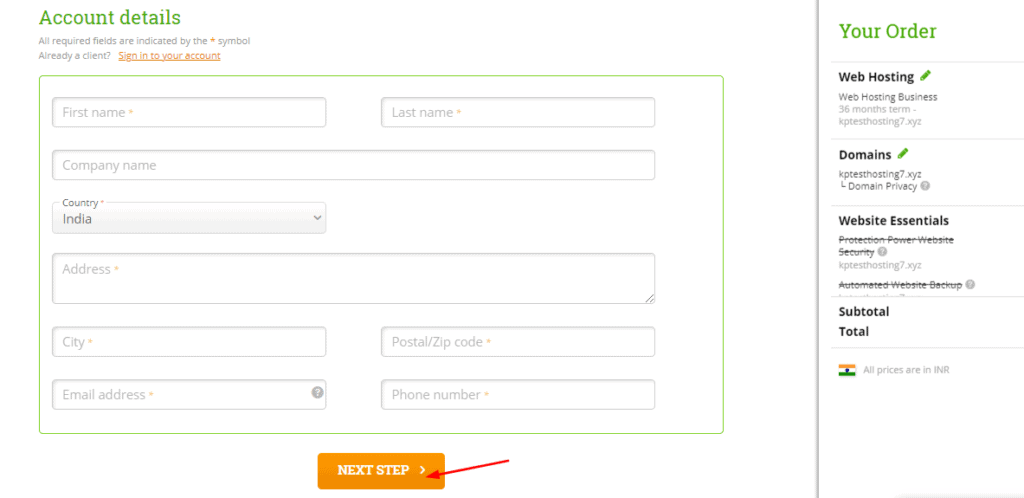
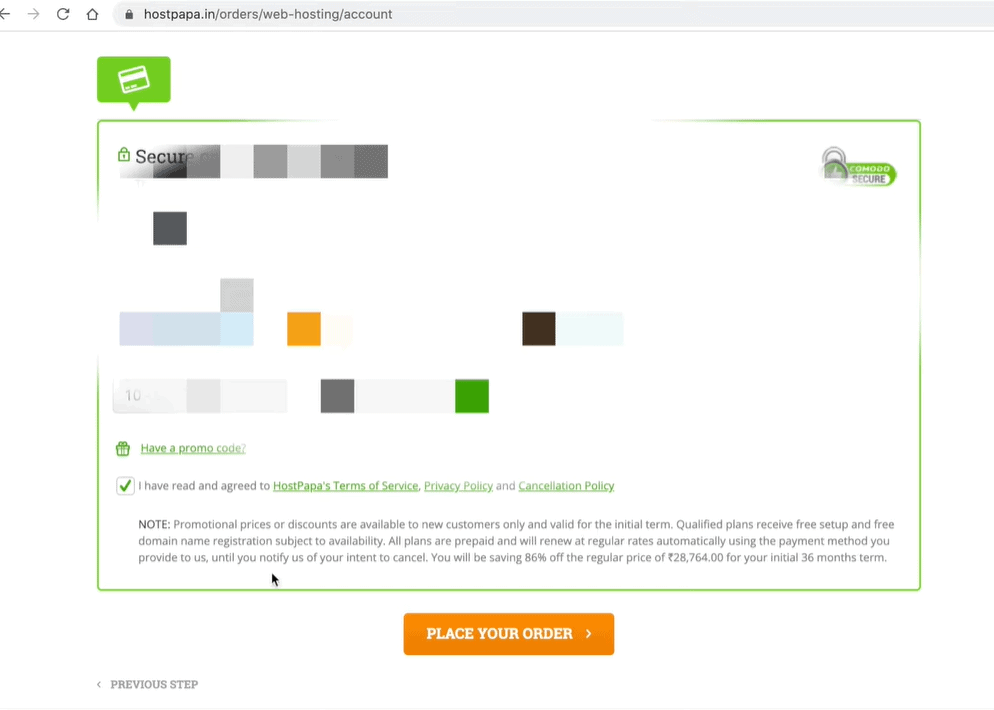
The important thing to note is that we need a debit/credit card with international validity to purchase hosting. RuPay cards won’t work here. We need to have MasterCard or Visa card.
If you scroll down, you will come across a note clarifying that these are promotional prices and are only for new customers. From the next time, regular renewal rates would be charged and your payment card will also be saved.
You need to cancel this option or they will deduct your money after your specified time duration automatically!
Step 6:
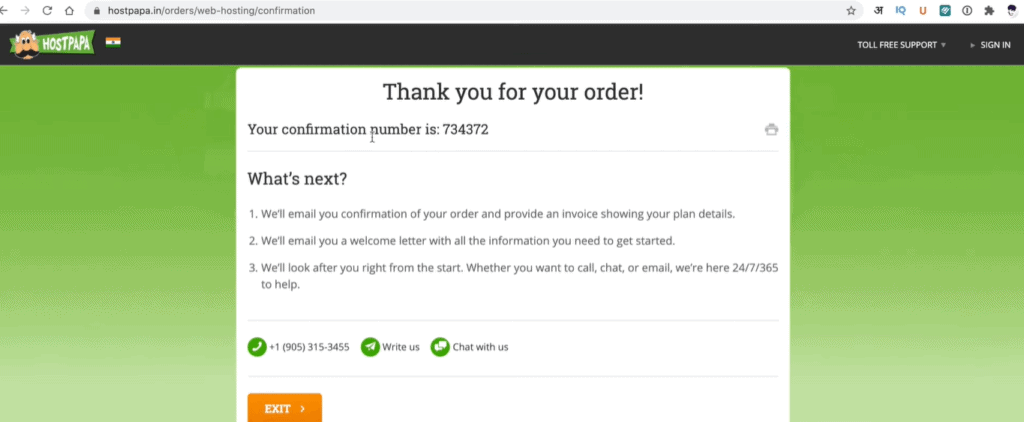
After clicking on ‘Place Your Order’, we will see a thank-you message displaying our confirmation number. We can click on the exit button now.
Step 7:
Next, we will receive a confirmation email after which our payment process is complete.
I did not receive any such email, so I contacted their support chat and it was not a delightful experience either. Eventually, after around 4-5 long hours of waiting, I received this mail from HostPapa.
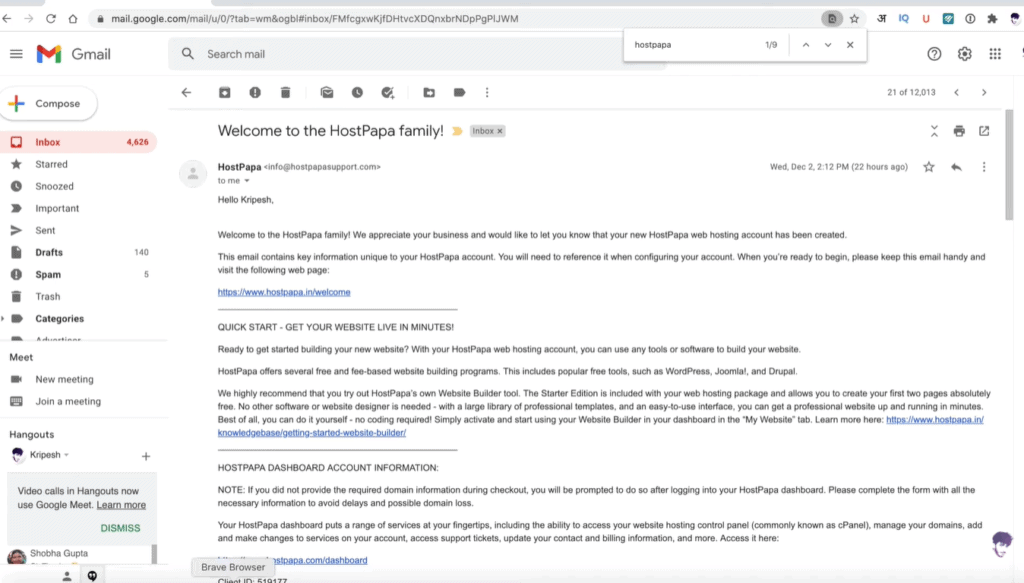
You will find the account login password, Client ID, and cPanel login password in this email.
Step 8:
Now, we will head over to its login screen, enter the Client ID and password that we have received through email and click on Sign In.
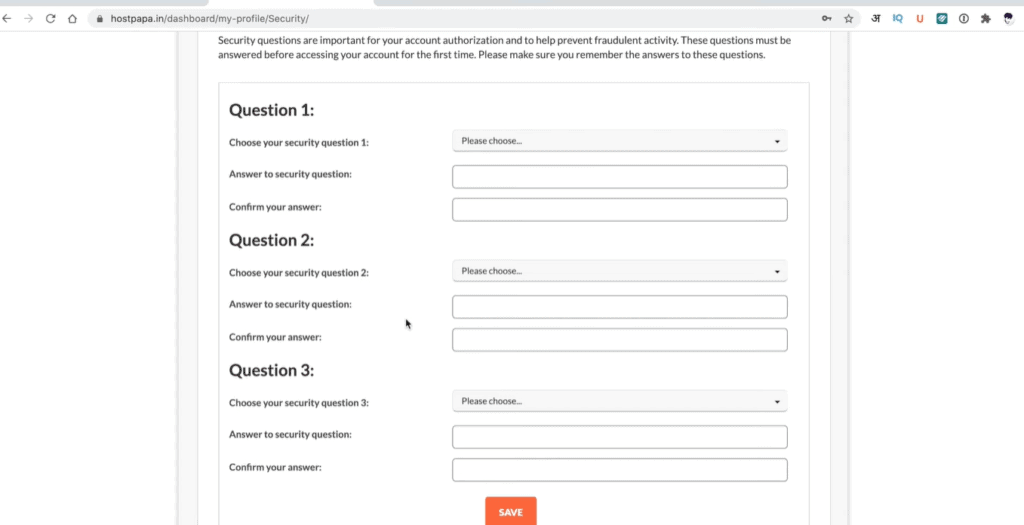
Finally, we need to fill in some security questions and we are all set to go. Our HostPapa hosting account has been set up!
Step 9:
HostPapa’s panel doesn’t look that impressive at first glance. On the top of the screen, you will find tabs for viewing your cPanel, your domains registered on HostPapa, and other options as well.
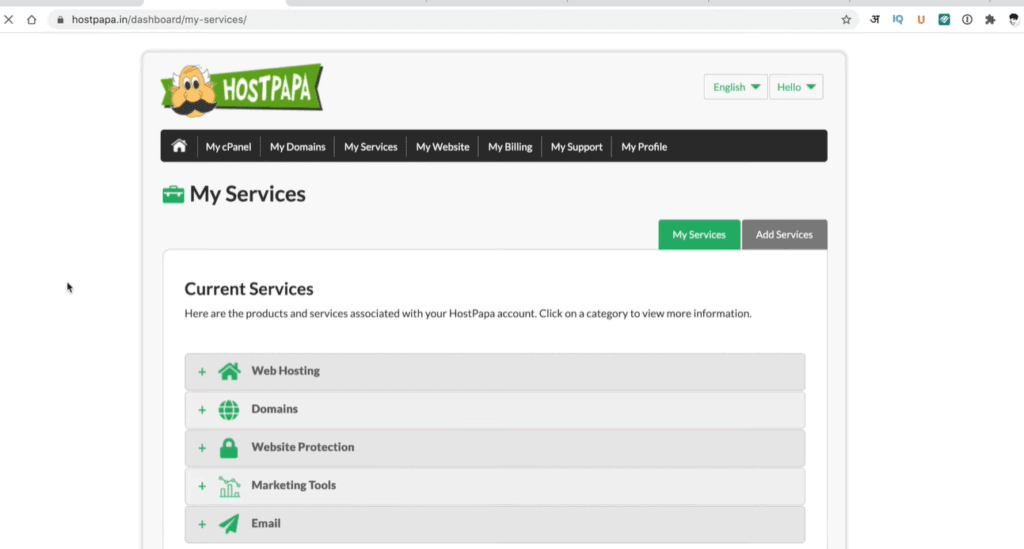
Even finding their Nameservers wasn’t that easy. Ideally, they should mail them to me, but sadly, I had to search for them on Google. So, it’s not very user-friendly!
Conclusion
I hope that this information helps you buy hosting from HostPapa. I will use this web hosting extensively for the next few months, and you can expect a detailed review of HostPapa hosting soon. So, stay tuned for that!
Also, if you liked this article and want to keep getting more such informative content, then make sure you sign up for my weekly newsletter! This is Kripesh signing off, guys! Hope you enjoyed reading. Let me know your views in the comments section below. Take care and keep learning!


1 thought on “How to Buy Hosting From HostPapa (9 Important Steps)”