Wonder how to preview your website without changing the nameservers? Tried several ways and wasted hours doing this? Or did you fall into trouble using the preview URL given by the web hosting companies?
These are the problems people often face when trying to test their hosting servers. Why do this? I will tell you exactly why and easy ways to do this.
I have stated the need for nameservers, what it means and related content. So, let’s get on with these effortless ways to preview your website without a domain or before switching the DNS entries.
Disclaimer : I strongly believe in transparency. If you buy using the links on our site, we may earn a small commission without any extra cost to you. This helps me to keep producing honest reviews. Read More >>
What is a Nameserver?
Nameservers provide an easy way to connect domain names to hosting provider. Nameservers usually point to our web hosting provider.
Example – I have a domain name on popular domain registrar Namecheap.com and shared hosting on Hostinger.
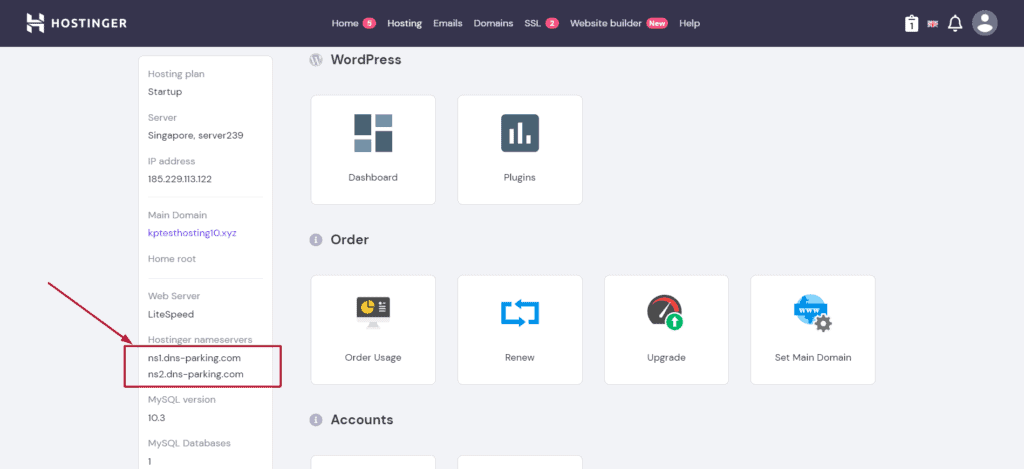
To connect my domain “kptesthosting9.com” to a hosting provider I’ll change my nameservers to the nameservers given by Hostinger.
In this case, the nameservers provided to me are — ns1.dns-parking.com
ns2.dns-parking.com
Why do you need to change nameservers?
There are 2 main reasons to change nameservers
- When we start our website and want to connect our domain name to our web hosting provider.
- When we change our web hosting provider and want to point our domain to new hosting.
Why should you preview your website before changing nameservers?
You would want to preview your website before changing the nameservers for one of the following reasons.
If you are transferring to a new hosting provider, testing your website on the server is the most crucial job to do, before you point your domain. You can verify the server works as you expected with no problems.
But this may not be possible as you don’t own a domain or it’s used to host your other website. You would like to test your site on the server before migrating.
Or, you want to test your new website before its launch? Yes, people want to check the design and test the functionality of their website before launching it.
Continue reading the article to know the convenient ways on how you can do this.
What is a preview URL?
You would like to check how your website will look to visitors, then the preview URL is what you need. Preview URL is used to preview the website prior to launching it. We do this to inspect the website for errors in design and check the functionality.
Preview/temporary URL helps to get an idea of how the site looks once it has been published.
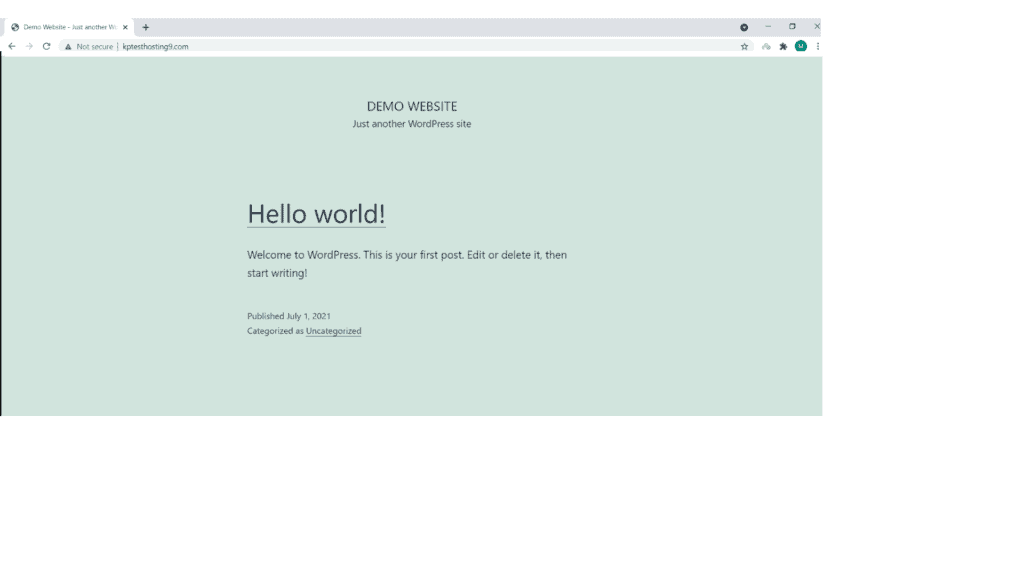
This is my demo website using a preview URL.
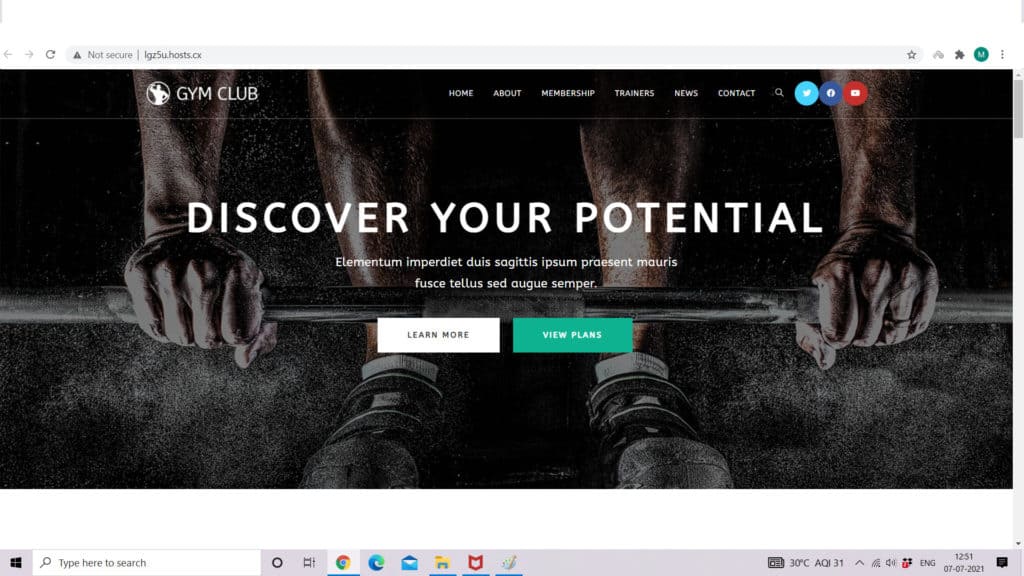
Also, a preview URL is used to check the capabilities of the server before hosting a website on it. You can check if the server of your new hosting provider works just fine as they promised.
You could ask your web host provider for a temporary URL, which they provide an option in the dashboard sometimes. Or you could follow the ways to get the preview URL of your site.
Method 1 – Using hosts.cx
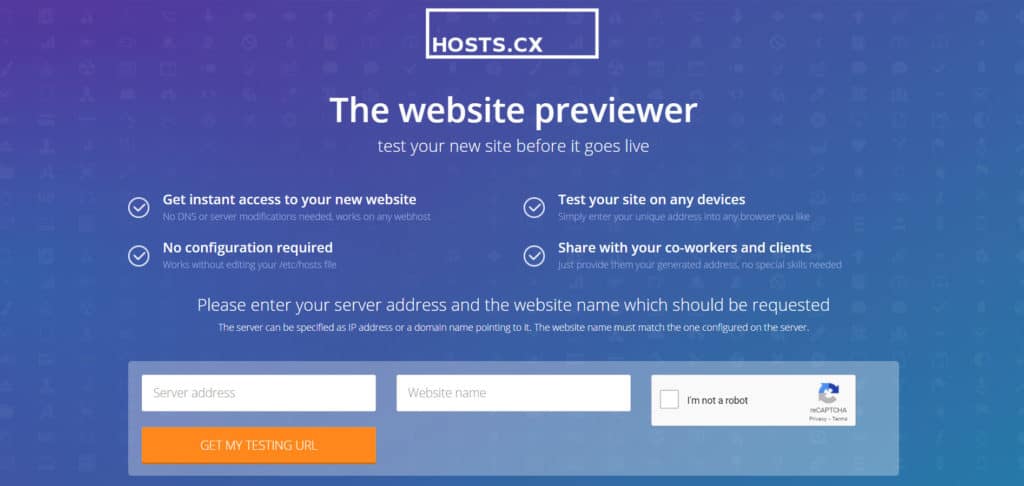
How to get a preview website without domain? This is the best method for this. Hosts.cx is a free, public website used to get a preview URL for your website. This method is easy and all you need is your server’s IP address and your website.
Step 1
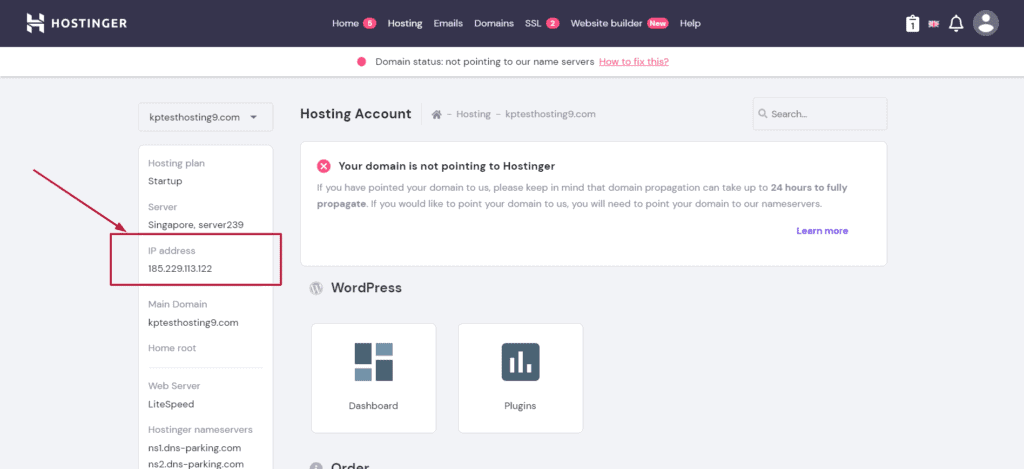
Your server’s IP address can be obtained from the dashboard or the control panel of your web hosting account. I hosted my website on Hostinger, and the server’s IP address is in the hPanel.
Step 2
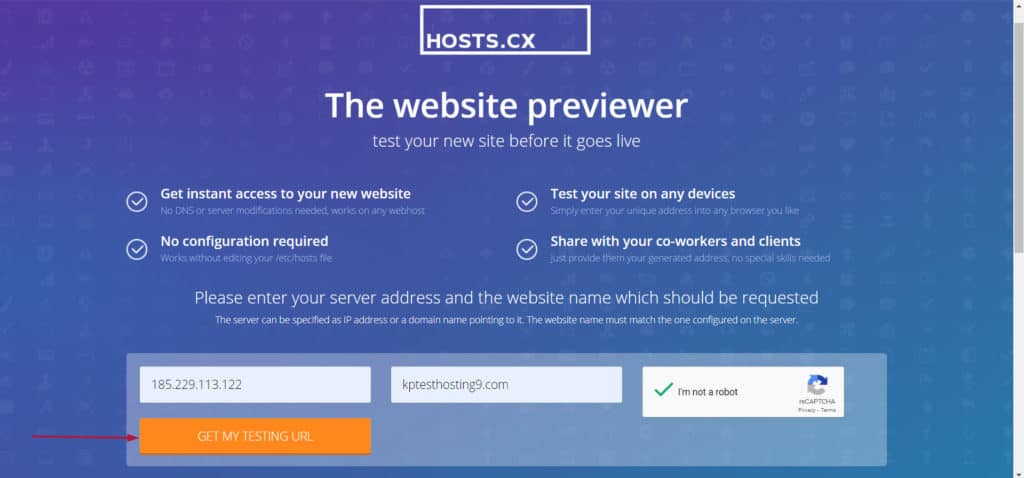
After you visit the hosts.cx website, you need to enter two things.
The server’s IP address and your website. Now, specify the IP address in the server address field and your domain name in the website name field.
Tick the ‘I’m not a robot’ prompt and click on Get my testing URL.
Step 3
Voila! You get a temporary URL for your website with a QR code. You can access the URL through your browser.
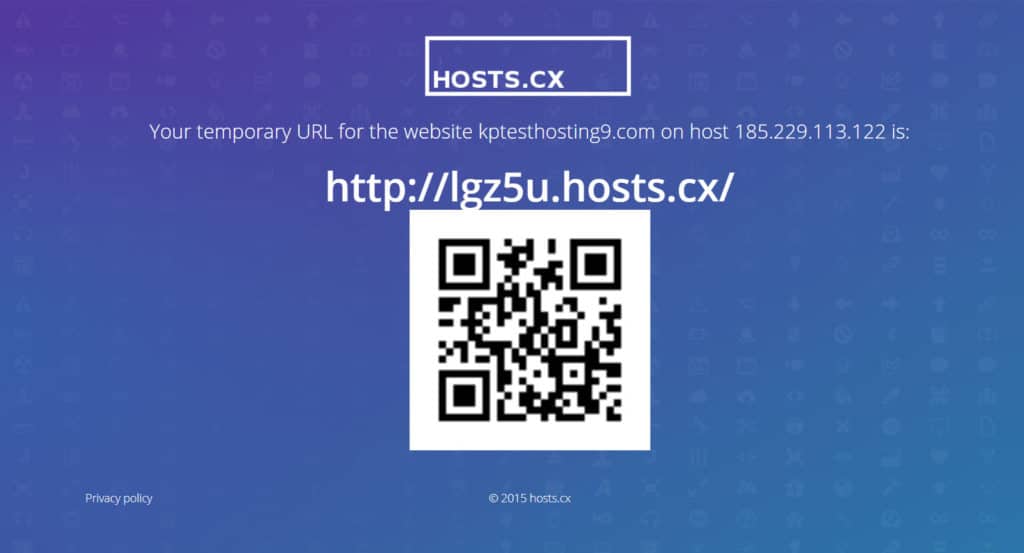
Another way is using the QR code, scan it from any device (even a mobile device) to access your website.
Method 2 – Editing local hosts file
This method needs you to edit the local hosts file on your computer so that you can preview your website before DNS propagation has been completed. It sometimes can be tedious, you would need to edit the system files and nobody else can view the results.
The above method works only for your system.
Follow method 1 if you are uncomfortable with editing configuration files.
Windows
Below is the procedure for the windows operating system, where we edit hosts file in the system.
Step 1
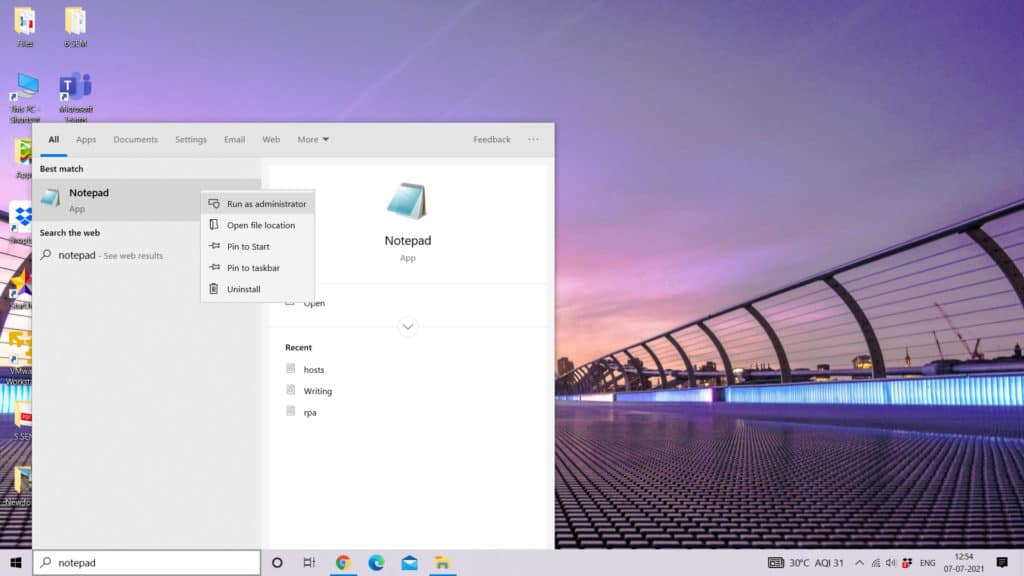
In the Windows menu, type Notepad. Right-click on the icon and select the Run as administrator option.
Step 2
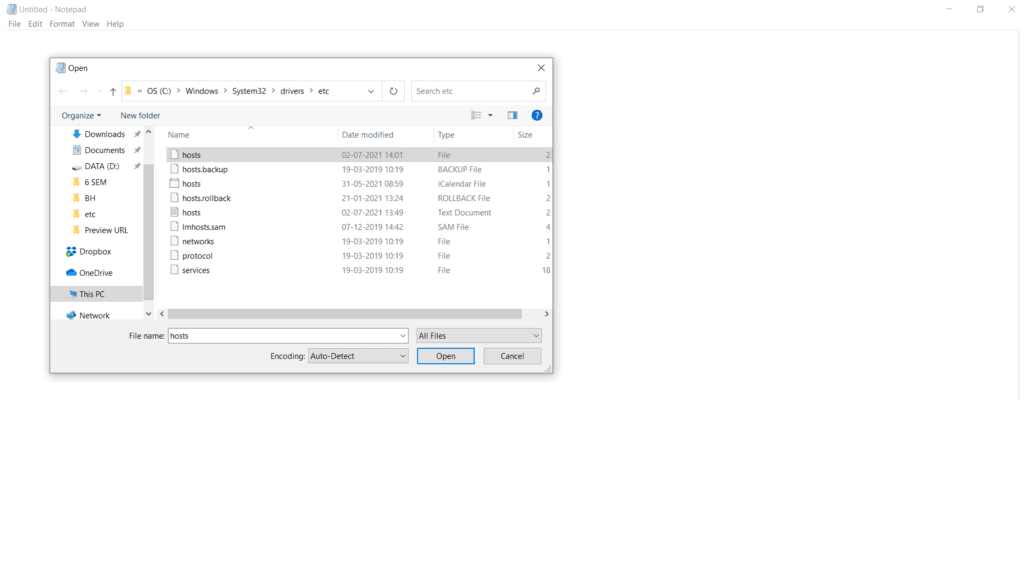
Open the hosts file from the file menu in the notepad (CTRL+O).
The location of the file is:-
C:\Windows\System32\drivers\etc\hosts.
If you couldn’t locate the file, then change ‘Text Documents’ to ‘All Files’ in the notepad. Now, you can access all the files, including the hosts file.
Step 3
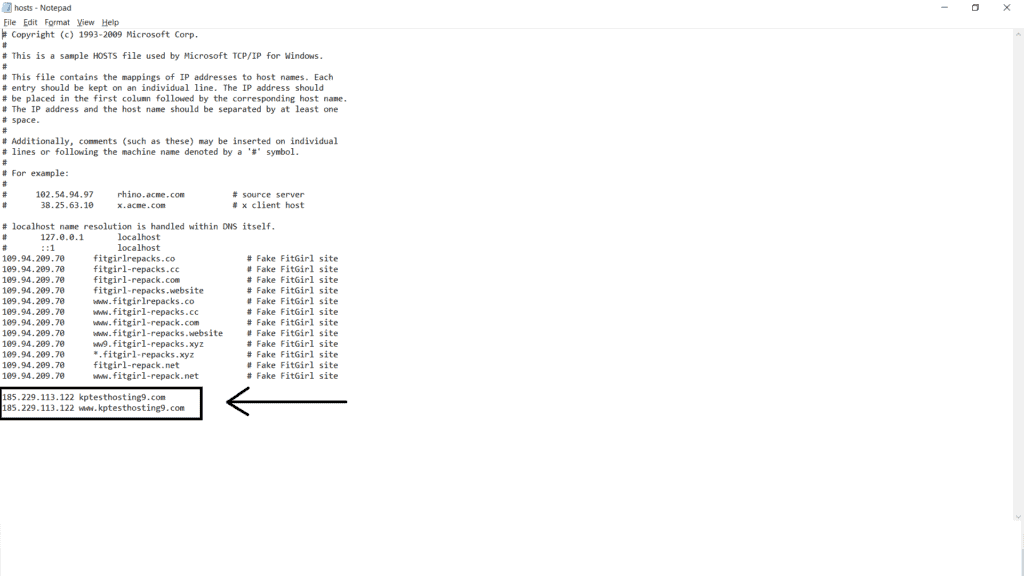
Next, you need to add the following text in the same format at the end of the file.
185.229.165.196 kptesthosting9.com
185.229.165.196 www.kptesthosting9.com
This is an example. Replace the IP address with your server’s IP address. Your primary domain should be added in place of the website name.
Step 4
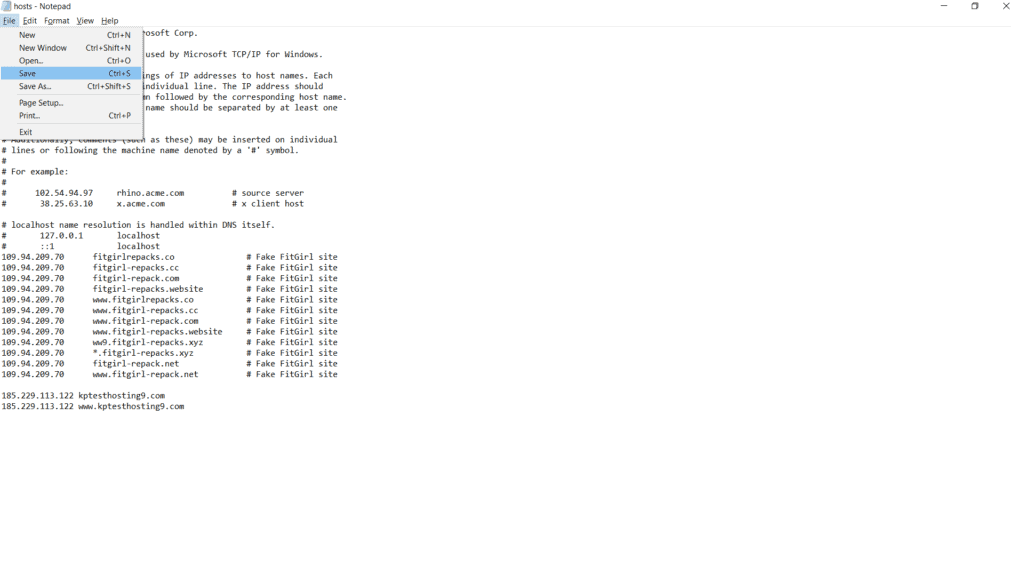
Save the file (CTRL+S). (Don’t use the save as option, use save option only)
Step 5
Close any browser tab if open and restart the browser. Type your website name and this will load your website from the server.
Mac Operating System
We will now check the procedure for Mac operating system.
Step 1
Open the Terminal app. You can open this through Applications > Utilities > Terminal.
Step 2
Next, we use the nano editor to access the hosts file. Use the following command to run the file.
sudo nano /private/etc/hosts
Enter the administrator password of your macOS account as you are executing the command as a superuser.
Step 3
Add the following lines (as explained for Windows OS) at the end of the file.
185.229.165.196 kptesthosting9.com
185.229.165.196 www.kptesthosting9.com
Step 4
Once you finish editing the file, save it using CTRL+X (CMD+X) and then press Y. Click Enter after you are done.
Step 5
Next, you need to flush the DNS cache. Following are the commands for different versions of the macOS.
El Capitan (10.11), Sierra (10.12), High Sierra (10.13), Mojave (10.14), and Catalina (10.15) -> sudo killall -HUP mDNSResponder
Yosemite (10.10) -> sudo discoveryutil udnsflushcaches
Snow Leopard (10.6) -> dscacheutil -flushcache
Lion (10.7), Mountain Lion (10.8), and Mavericks (10.9) -> sudo killall -HUP mDNSResponder
Step 6
Open a new browser tab and type your website. This will load the website on your screen.
Linux Operating System
The process for Linux users is similar with few changes.
Step 1
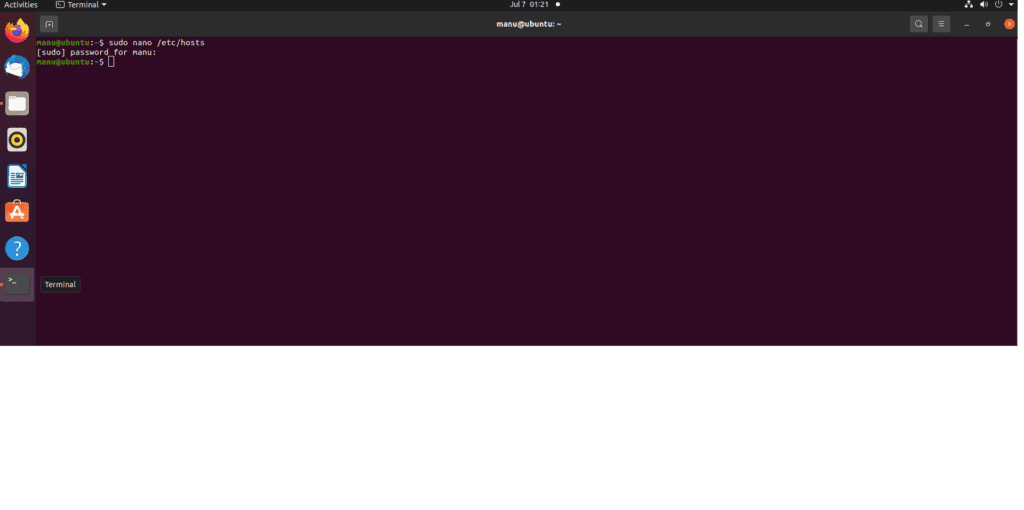
We will use the same nano editor for Linux as well, in the Terminal.
Use the following command to edit the file:
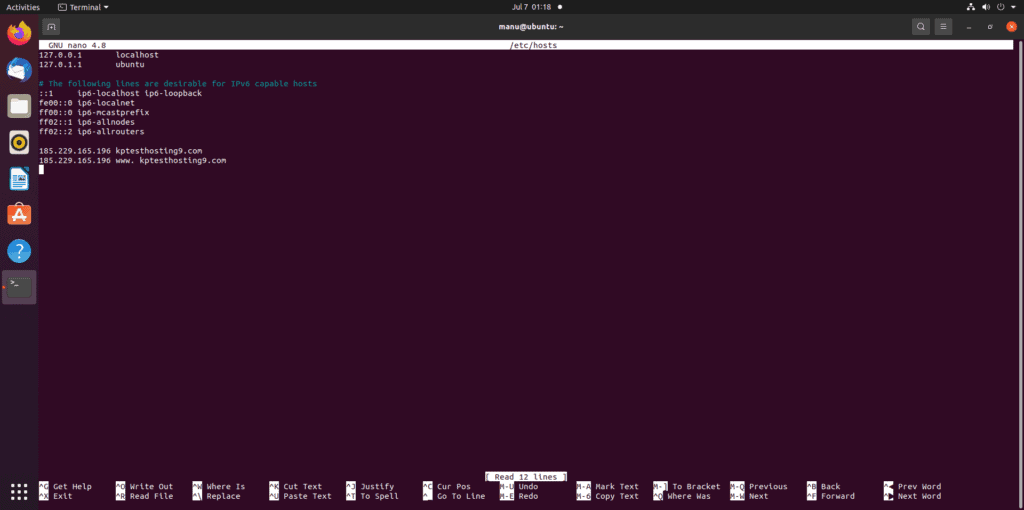
$ sudo nano /etc/hosts
Or you can use the gedit text editor as well. The command for that is:
$ sudo gedit /etc/hosts
Step 2
Add the following lines at the end of the file (as mentioned for other OS)
185.229.165.196 kptesthosting9.com = [IP address (space) website name (without www)]
185.229.165.196 www.kptesthosting9.com = [IP address (space) website name]
Step 3
Save the file using CTRL+X, then press y.
Note: If you want to revert the changes, just remove the two lines from the hosts file. This applies to all three operating systems.
Conclusion
We now have come to the end. Hope you could follow the steps and get your preview URL. Both the ways are easy to follow and complete.
Let me know if you faced any difficulties while following the steps. Leave a reply in the comment section and I will clarify your doubts.
Also, let me know if you completed the process and got your preview URL.
Anyway, if you enjoy reading my content, you can subscribe to my Newsletter to receive all the latest updates! This is Kripesh signing off. Cheers and happy learning! 🙂

